Here's a tutorial for a new project I spent the day working on...
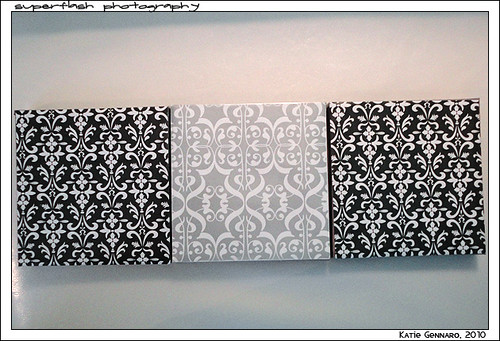
I started out wanting to make just a set of canvases for my bedroom... but as I was working, I realized that with the b&w colour palate, I could actually use these for multiple occasions, and switch them up every once in a while... and so the Interchangeable Canvas idea was born!
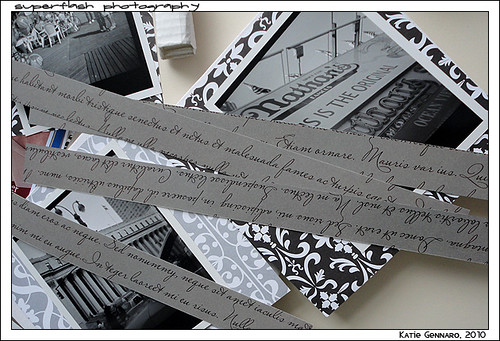
Materials:
- 3 canvases (I found mine in a 3 pack at the dollar store)
- scrapbook paper (I used 4 different sheets)
- double sided tape, regular tape, and glue
- photo corners
- laminating plastic (Also found this at the dollar store)
Steps:
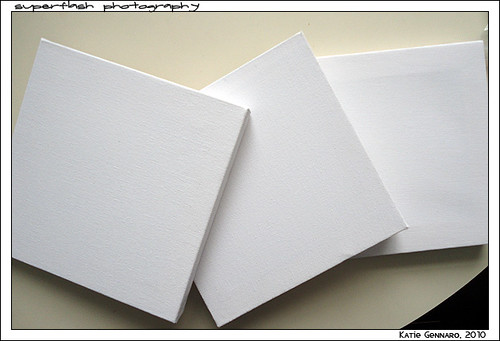
1. Start with your blank canvases... so much potential here! Use your creativity. My bedroom happens to be black & white damask, with 3 bright fuchsia walls, and one grey wall. I had some damask paper in my collection that I had specifically bought to be some sort of bedroom decor, so I used that. Use whatever tickles your fancy, but make sure it's something that you really like, because it'll be the "permanent" part of the interchangeable canvas.
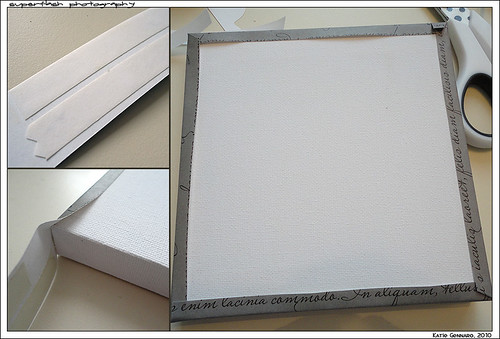
2. Gather your paper and cut down to size. My canvases were about 4 inches square, and I also cut 1 inch strips for the edges of the canvas (the 1 inch leaves a bit of overlap so that the edges look a bit smoother). The paper I chose was a black on grey Latin (I think?) script. I thought it was a nice complement, while still staying within a neutral colour scheme.
3. Apply your double-sided tape to the 1-inch strips. Expose the other side of adhesive, and stick to the edge of the canvas. I left the paper long enough to wrap around two sides, and did a traditional gift-wrapping type corner on the canvas. If you need to, you can actually use a dab of glue or even tape to help the paper stay down, because it will be covered by the main canvas paper.
4. Glue your scrapbook paper (which has already been trimmed to size) onto the canvas. I just used a regular ol' glue stick here. Cut your laminating sheet down to size (mine was about 6.5 inches square). Then, peel the backing from the sheet, and making sure you're working on a clean surface, lay it down, sticky side up, and lay your canvas, right side down, on top of it. Smooth out any bubbles, and wrap it around the edge of the canvas, all the way to the back. You can use staples into the frame of the canvas if you want to secure it a little bit more. At this point, you're pretty much done! The canvases can be hung as is, or you can add some artwork to them. I added stuff, so I'll keep going with that step...
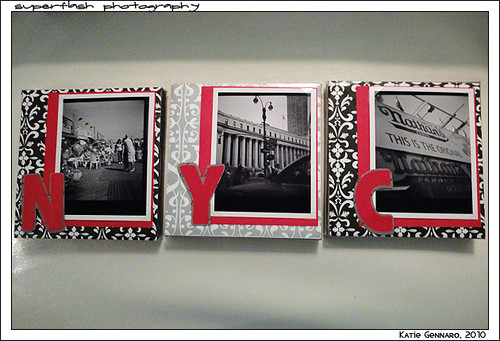
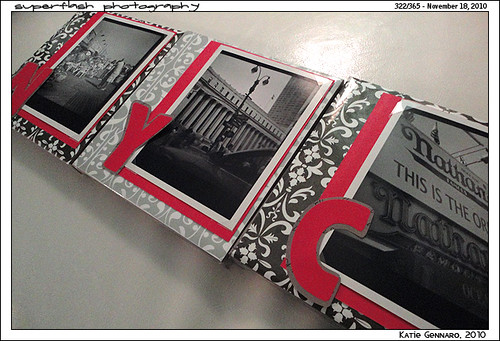
5. So, I had some photos that I took on my last trip to NYC, with my Diana+ lomography camera... since they were shot on film (and I have no idea where the negatives are, since moving), I didn't want to glue them down, or glue anything to them. I secured them to pink scrapbook paper using photo corners, and the "N" "Y" and "C" are only glued to the scrapbook paper, not to the actual photos. The art is stuck to the canvas with just tape... and the tape peels away from the laminate easily, so whenever the mood strikes, I can change up my canvases and have some new art on my walls!
Now I just need a hammer and some nails to actually get these things up on my wall.
Like this tutorial? Try it? Leave me a note and let me know!

3 comments:
That's a great idea! (and it turned out fabulously!) I'm passing this on to my sister, who will probably be all over it for her apartment! :)
Thanks Melisa!
It was also SUPER easy to make :)
Ooh, love it! Pretty paper too. You go, creative girl! As always :)
Post a Comment